
This fun little gift bag is so easy to make. Why make your own gift bag when you could buy one at the store? Lots of reasons... you can make odd shapes and sizes to accommodate exactly what you are giving; you can design a set of pieces to the gift that all match, like the greeting card matches the bag that matches the tag that matches what's inside; you can make something way prettier than what the store offers. And, you can say to the recipient: "I made this bag just for you!"
Now that you're ready, here's what you need for the project:
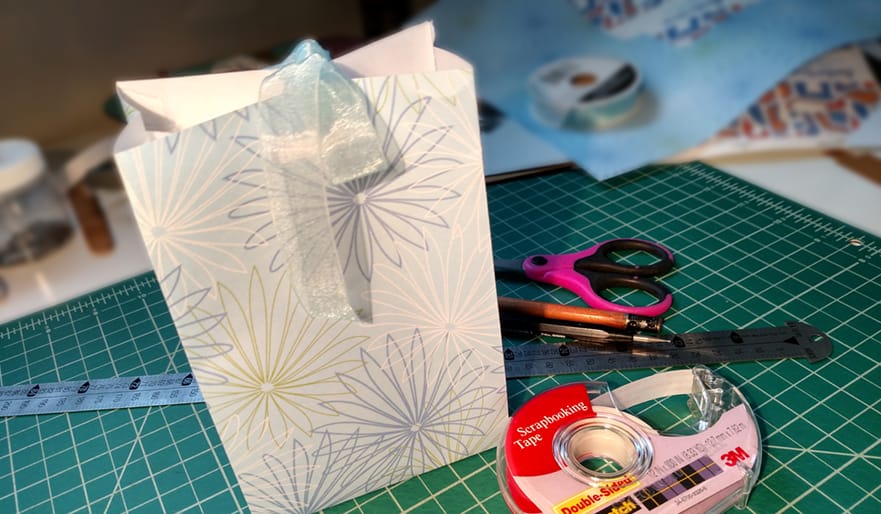
1. DESIGN On scratch paper, sketch out the dimensions for your bag, which will let you know how big your paper should be; it's bigger than you think. Use this free template as a guideline. 2. DRAW YOUR TEMPLATE On your cutting mat, lay your paper with the good (outside) side down, and tape it to the mat. Draw out the template you designed for your gift bag, being sure to include the flaps. 3. CUT OUT THE TEMPLATE Carefully cut along the lines ~ this is where the x-acto knife is really helpful ~ being sure to angle the ends of the flaps just slightly. If your bag will have a hole in it for a ribbon or string, now is the time to cut that hole. 4. SCORE THE PAPER Turn your paper over with the good (outside) side up and, using your ruler and the scoring tool, score the paper wherever it will fold. Please note that paper folds better if you score into the fold from the outside; the heavier the paper, the truer this is. 5. FOLD THE PAPER Everywhere you scored, fold the paper, then unfold it before gluing. If you forgot to cut a hole for string or ribbon, you can do it now. 6. GLUE (or TAPE) THE FLAPS It's best to put the adhesive on the flap itself rather than on the part of the paper you're glueing to; that way, you don't end up with glue where you don't need it. 7. ASSEMBLE THE ENVELOPE With the adhesive exposed, gently fold the gift bag into its finished shape. Put your gift and some paper in the bag, add a ribbon and that's it! TINY TIP: Wallpaper is terrific for making bags and for gift wrap. Keep your eyes peeled for leftovers. Now, we want to see your handiwork. Click here to email us a photo. Be sure to give us your first name and where you live. 
Kim Phillips | Tiny Creative House
© 2016 Kim Phillips 
1 Comment
|