
Wintertime doesn't have to be "down time" for gardeners. If you gathered seeds from your plants at the end of the last growing season, you can share them with friends. Putting them in hand-made seed packets makes a charming gift. Making the seed packets is easy, using recycled materials and other things you have at hand.
Here's what you need for the project:
1. MAKE YOUR TEMPLATE Decide what size you want your finished seed packet to be; in this example, the packet is 2.5" x 3.5" but any size will do. On your cover stock, draw out the main body of the seed packet with a pencil, plus side flaps, bottom flap, and top flap. Save the template to re-use later. 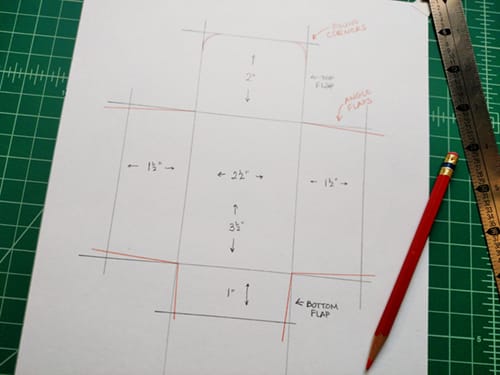
2. TRACE AROUND TEMPLATE ONTO PAPER
Trace around the edge of the template, then use a red pencil to angle the edges of the side flaps and bottom flap; this makes folding cleaner. draw the round-cornering on the top flap. Note: You'll want to score where the folds are before you cut out the packet; do the scoring on the outside ~ the "good side" ~ of the paper. 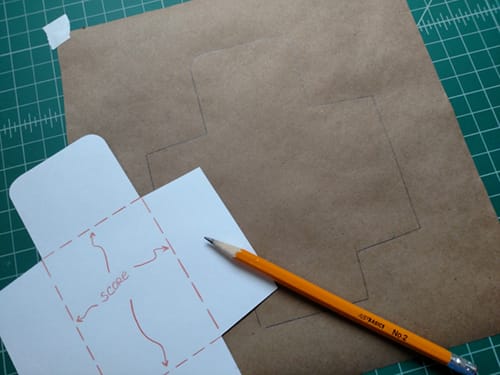
3. DECORATE THE PACKET
This can be done now, or after the packet is assembled. I like to do it at this point, before cutting and gluing, because the paper lays flatter. Your decoration can be drawn, painted (if the paint doesn't buckle the paper), stamped, colored with pencils, or you can glue things to the packet. (Remember to leave a clear space where the flaps overlap.) 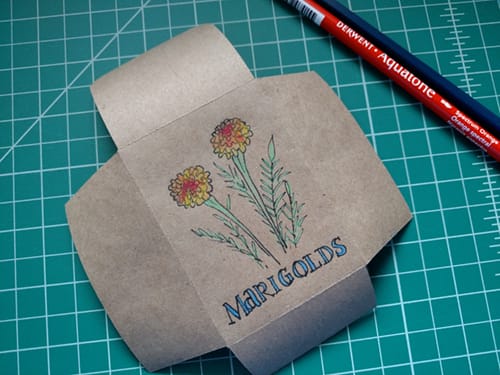
4. FOLD AND GLUE
Turn the paper over to the (blank) inside, put a thin bit of glue on one of the side flaps, fold in the other flap, and press the glued flap down. Be sure that none of the glue seeps inside; this will ruin the packet. Then, glue and fold up the bottom flap. That's it ~ your seed packet is done! 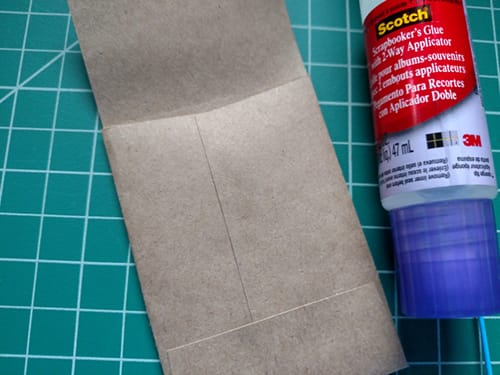
A NOTE ABOUT GLUES & ADHESIVES For paper crafts, some glues are better than others. You want glues that won't wrinkle the paper. I like the Scotch scrapbooker's glue shown here. Some glue sticks work well and don't wrinkle the paper, but the adhesion will be less strong, and you don't want your seed packet popping open! Spray adhesives are great when you need to cover a large area. Choosing the right glues and adhesives for paper crafts will be covered in more detail in a future post. 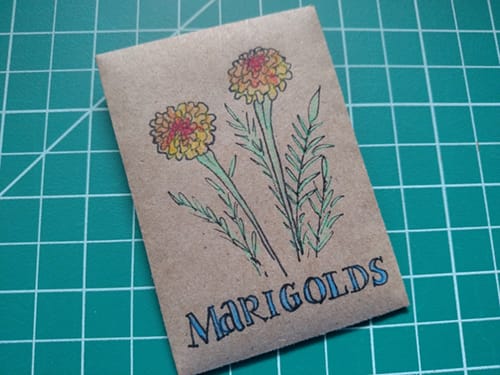
HOW TO CLOSE YOUR SEED PACKET After you add the seeds, you can seal the packet with a dot of glue on the top flap. Or, you can get fancy and punch a hole through the closed packet and run a ribbon or twine through it; this is a nice technique if you want to tie the seed packet to another gift. WHY YOU'LL WANT TO BOOKMARK THIS POST Now that you know the way to make a seed packet, the same steps work well for making any sort of envelope. Here are some ideas:
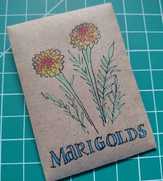
Learn more about the humble marigold; click here. Did you miss the last Tiny Project? It's here. 
Kim Phillips | Striver-in-Chief
Tiny Creative House ©2016 Kim Phillips | Tiny Creative House 
1 Comment
8/30/2017 12:32:39 pm
This seems like a fun and crafty thing to do. I'd love to try this out for myself. My aunt has a garden in her home, so I'll ask the seeds from her. This seed packet is a great material as a gift card holder or for other things as well. My sister would definitely be interested in trying this out. She's a fan of making artsy resourceful things. Leave a Reply. |